I took a parchment workshop at the Meyers Tannery in Montgomery, NY, May 18th and 19th. Jesse Meyer has been specializing in parchment for about 10 years however, his family started in the leather business about 500 years ago in Germany, and they've been in business without interruption since. Anyone interested in seeing the handmade sample book I brought home, let me know. He has calfskin (including slunk), deerskin, goatskin, sheepskin and will finish for bookbinding, C&I and double-sided for printing/bookmaking/C&I on both sides.
We may have used modern equipment (in some cases 1800's "modern" equipment) to do many of the steps, but the steps are basically unchanged through the years. All I can say is THANK YOU to everyone who invented the modern tools we were using (like power sanders) and what you pay for is what you get.

Jesse picked out the goat skins at the slaughter house ahead of time They have been salted (NaCl) to preserve them and help draw any remaining blood out.

We prepare the skins for wetwork by cutting off the ears, tails and entrails.
It really wasn't smelly.

Then we throw the skins into what is basically a large drum that agitates and can rinse (like a washing machine). This saves us from having to stand around and stir the skins in the tubs for days with the dehairing agent...

Pile of skins in the drum with hair on.

The skins after they've been in with the dehairing agent for 45mins (think Nair).
The foam that came out was pretty nasty.

Here you can see the hair is gone, but there's still "fat". At this point we added lime tp swell the skins more and help the dehairing agent be most effective.

The skins after the lime and dehairing agent. They look and feel slippery (many said the word octopus and rubbery at this point).

Jesse using an industrial machine to flesh (remove the fat) from the skin. We would've been there all day if we had tried using knives for this step.

The skin after it's been "fleshed." The only trouble with using a machine is it leaves some marks (most are worked out later).

mmmm - fat. The soapmaker in me cried at the waste, but the dehairing agent is Bad Stuff(TM)
Now you repeat the lime and fleshing parts as necessary. Then you delime, bate, neutralize and bleach the skin. At this point, depending on what you will do with the skin, the process varies. After a final inspection and trim, you can dry it for later or dye it. We did both (on separate skins of course).
Here's the process for the dyeing route:
We're dyeing the goat skins.

Choosing our prepped goatskins for dyeing. The dyes are water based. The hardest part was choosing a color.

Some "Perma Red" dye is prepared.

People dyeing their skins blue. Unless you wanted a tye dye effect, you had to keep the skin moving.

Once it reached the color you wanted, you rinsed the excess dye out with water.

It looked like we were killing things. We really made a mess.

This is my goatskin being rinsed.

Then we stretched our skins to dry. They got darker as they dried (we all went "duh" over this).

Once dried, they were very stiff (and thin!). Here, Jesse is buffing the split side of one as an example.

What the split side looks like partially buffed. The back is the "split" or hair side.

My dyed goatskin (remember how light it looked in the pail?)

My dyed goatskin in the sun.

The flesh side (front) compared to the split side (back).
Here's the process for the undyed route (remember, the beginning process is the same):
We're using calf skins.

How they hang the skins to dry.

Rehydrating our calfskins.

Jesse stretches one to show us how.

I finally manage to get my skin stretched. This is way harder than you would think as it needs to be even and tensioned correctly. The "clear" areas towards the center are water.

Here I am scraping my hide with a knife. Notice the light marks (water) are going away. This really gies you an upper arm workout.

My scraped hide dries for the night. I go home sore and tired.

The next morning we now dry scrape them to get the rest of the "flesh" off. Yup, that rough looking stuff is veins and flesh - yum!

I have now scraped and sanded using 80, 120 and 320 grit sandpaper and a dry sponge between. Remember those sore shoulders & upper arms??? This took a few hours to do and that was WITH a power sander!

If you look closely, you can see my hand through the parchment. Remember, the lights are shining on the FRONT of the parchment, this stuff is THIN at this point!
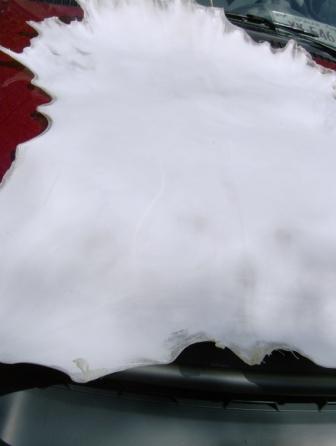
My skin in the sunlight

Me with my parchment at Pennsic A&S
Comments
Post a Comment